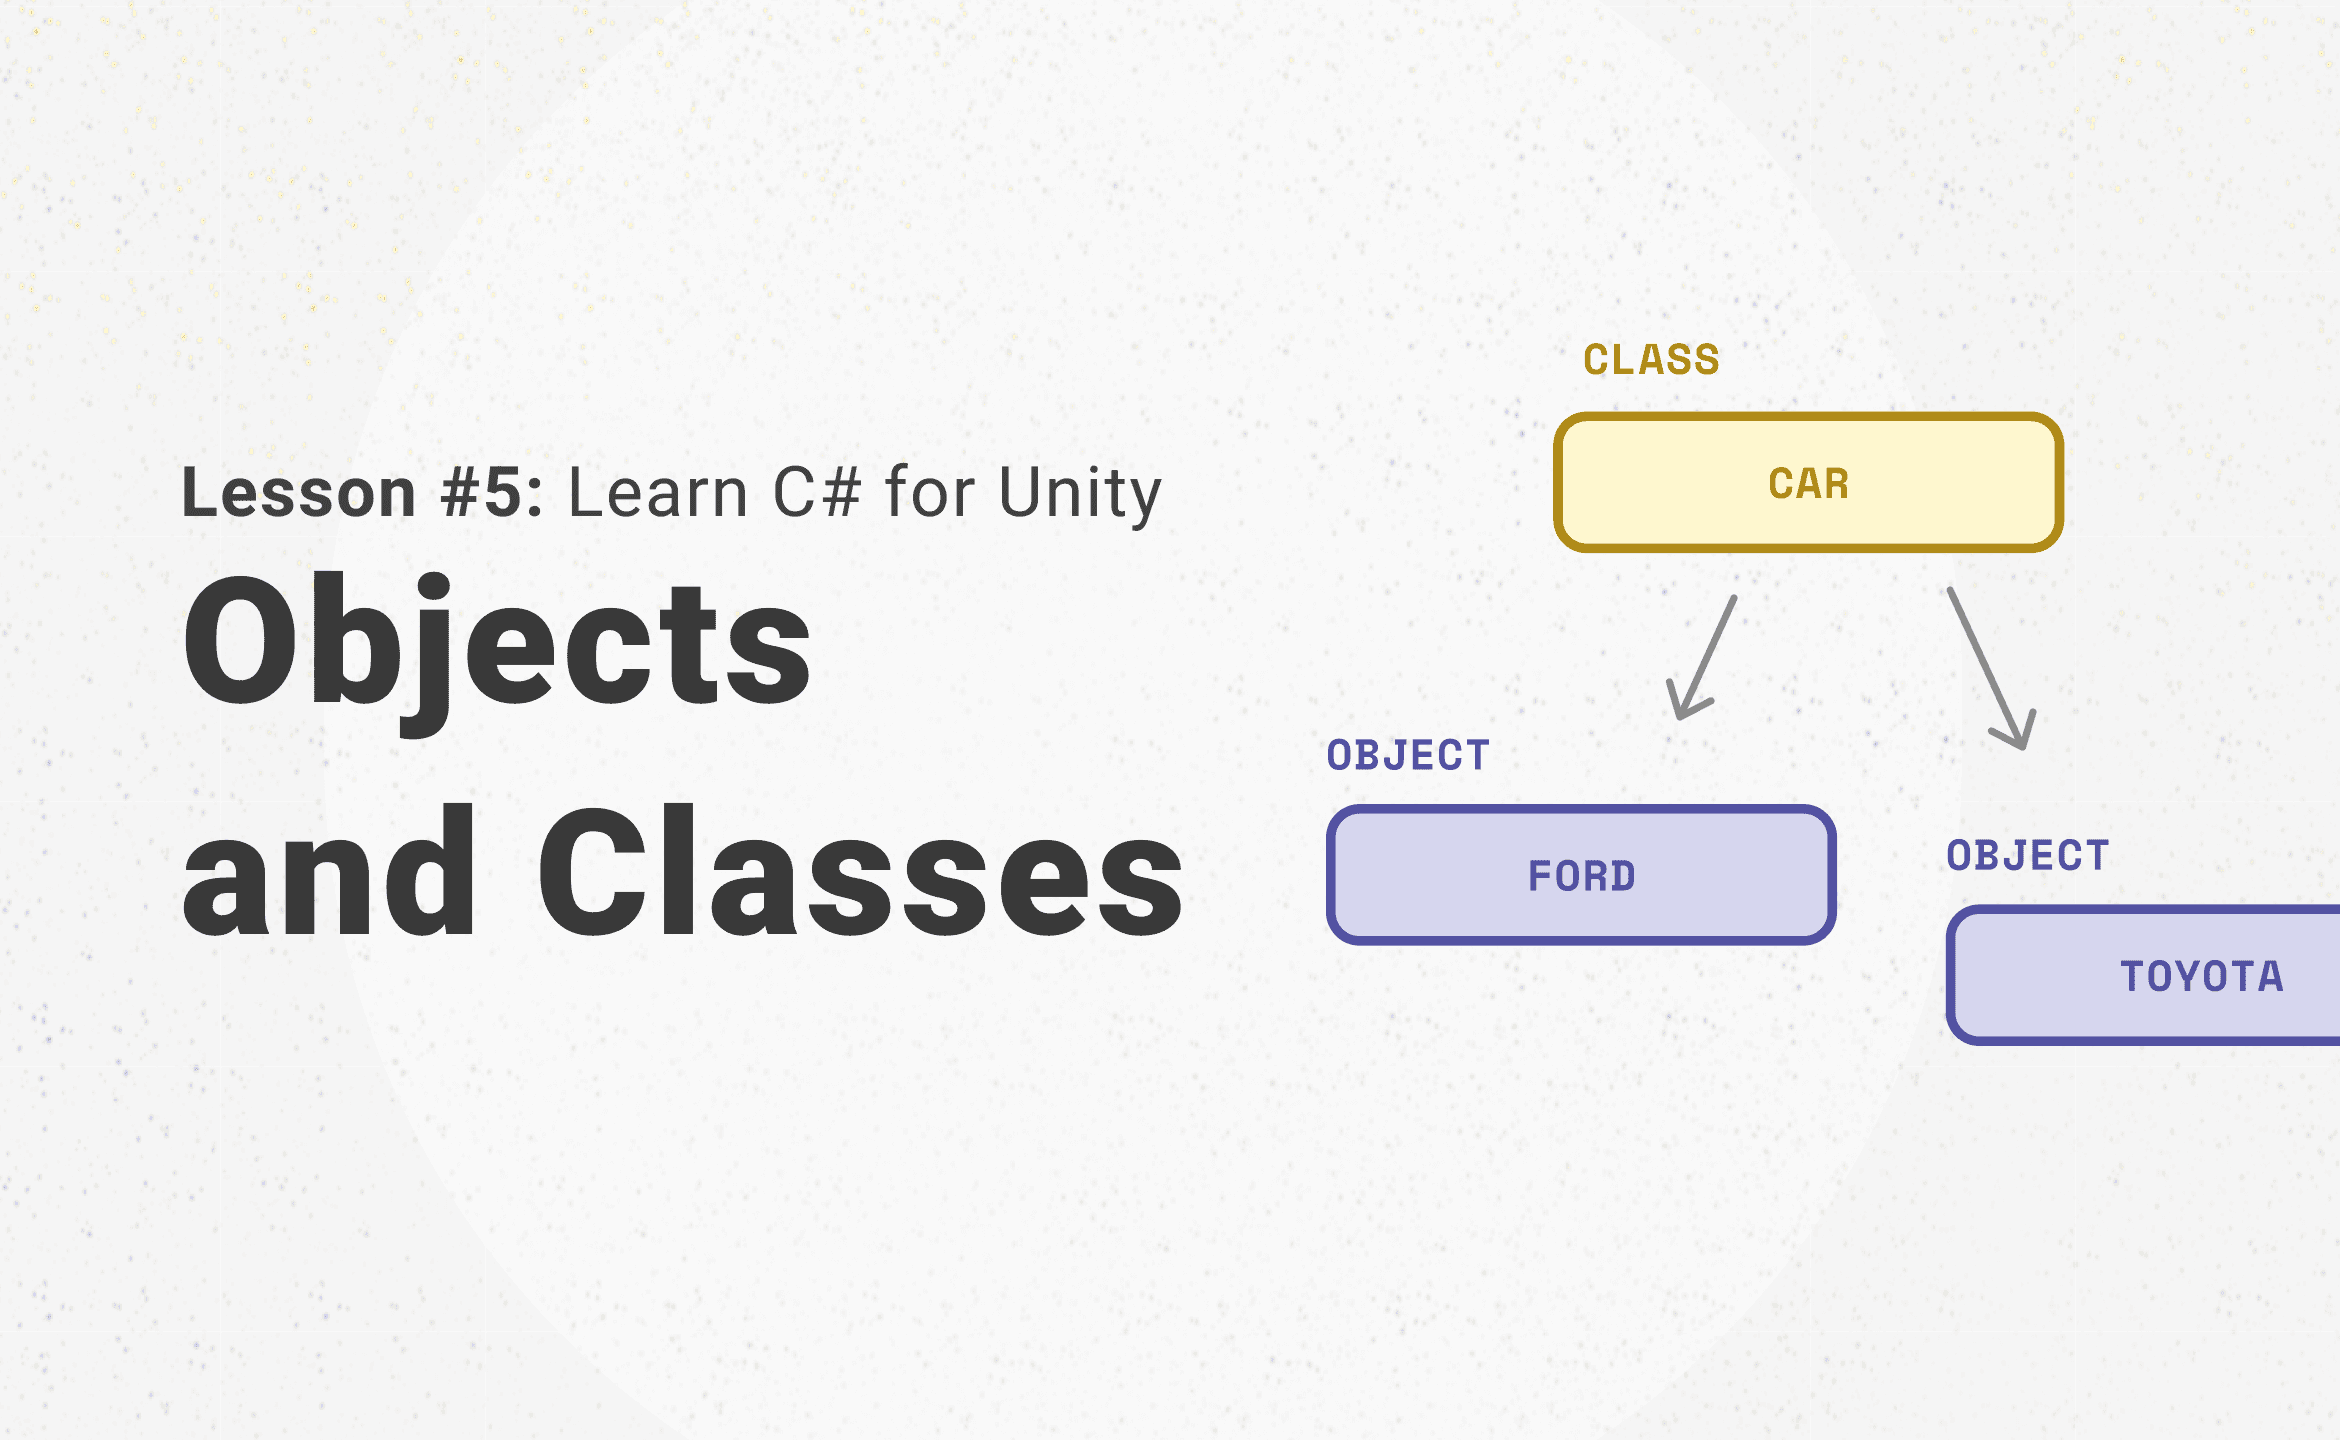
So far, we have used basic data types such as int, bool, or float. However, representing complex structures with only these simple types can be a challenge. Imagine having to manage a bunch of enemies, all with their health, weapon, ammo, and being able to do different actions, and all that with their data scattered around the code.
Classes are a way to define a custom data type through a process called encapsulation that groups related data and methods together. In truth, we have already come in contact with classes, like that Transform (that encapsulates position rotation and scale) we used in chapter 3.
Class Declaration
When you declare a class, you are creating a new data type. It means you will be able to create variables of that type and have access to every data included in the class definition.

It is a good practice to declare a class in its own file with the same name. In this case, this code would be inside the VRController.cs file.
The code above will only create the new data type named VRController, but to use it, we need to instantiate a VRController object, that is, separate some space in memory for all the data stored in that object. Classes are like a recipe for how you create and use instances of that type.

If we were to just declare the “leftHandController” variable and leave it unassigned, its value would be “null,” just like an array variable would.
Fields
Like said before, classes are a way to organize complex data. Fields are one of the primary ways to do this. They are basically variables that belong to that class.
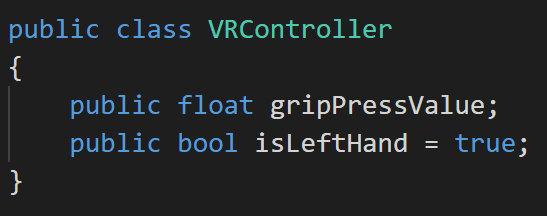
In short, to create members of a class, we just need to add variables inside the class declaration, just like we were defining them before, with an access modifier (public, protected, or private) in the beginning. The access modifiers will be covered later in this chapter; for now, let’s just assume everything is public.
Again, it is important to note the differences between classes and objects. The code above declares that every VRController object has the fields gripPressValue and isLeftHand, but since each object is a completely different instance of that class, they have their own values for the fields.
It is a good practice to name the fields using the camelCase pattern — the first word starts with a lowercase, and the first letter of the second word starts with an uppercase letter. It looks like a hump on a camel's back.

Methods
Every method and variable (field) belongs to a class. When designing your project, it's crucial to think well about where each data should belong to, and what each class can do. Methods are often thought of as actions that a class can perform.
Just like with variables, methods' usage with classes is pretty much the same as we have been doing so far.
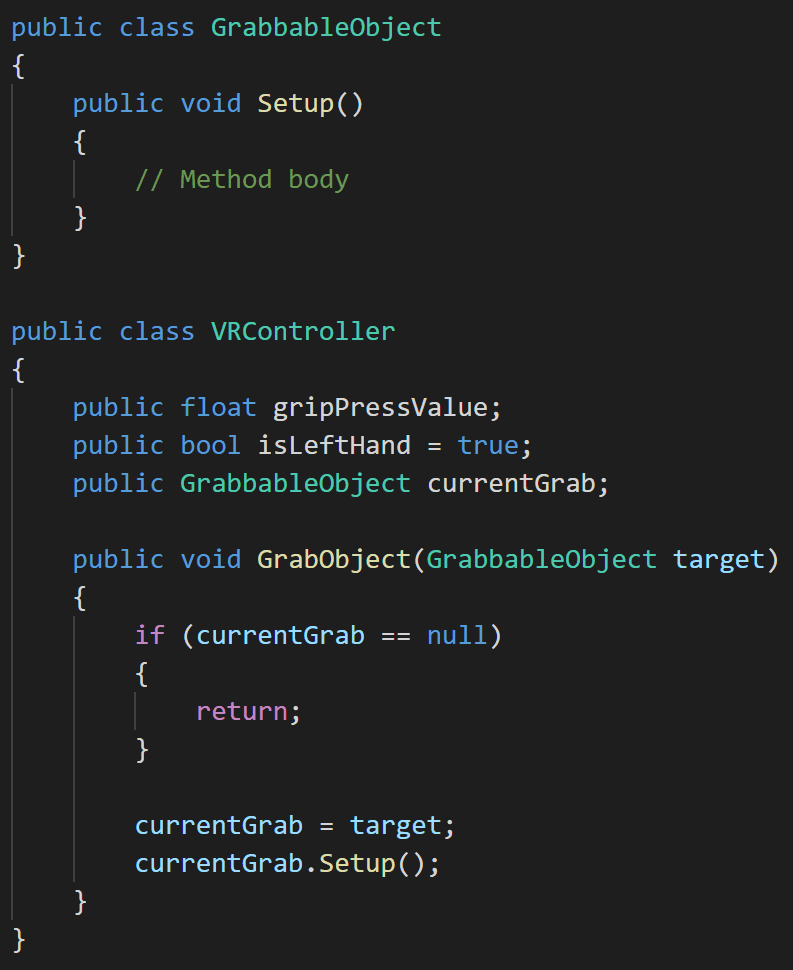
As you can see, pretty much like we were doing before. It is important to notice that the method can access the method argument variables, any local variable declared within the method body, and any class variable.
"currentGrab.Setup();" is an example of how to call methods. Again, just like we’ve been doing so far, just remember that with a dot (the fancy name is Member Access Expression), you can access the internal structure of a class.
Public vs. Private
It is finally the time to talk about those pesky publics! 🙂
Consider this: We have an awesome method that sets the gripPressValue, that adapts to whichever VR Device we have and whatever other validations and evaluations necessary to be the very best. Only for some rando to go and reset gripPressValue to a wrong value, or maybe just keep calling our exceptional method with no need at all, hindering performance.
That’s where public and private comes in. Any class member that is set to private can only be accessed by other members of that same class. Meaning that, if we set the gripPressValue and our awesome method to private, all those shenanigans are off the table.
When you are developing your program, always keep in mind who should be responsible for what. These decisions are in no way black and white, but there are some principles that can help you along, like the single responsibility principle.
Properties
Properties are an extra way to protect your class against unwanted uses. Consider the following:
Should gripPressValue be ever set to a negative number?
We already know that gripPressValue should only be changed by the class itself, but accessing the current gripPressValue will be most certainly necessary.
Properties are kind of a variable that when interacted calls one of two functions:
A get() method when the property is accessed
A set() method when the property is assigned a value
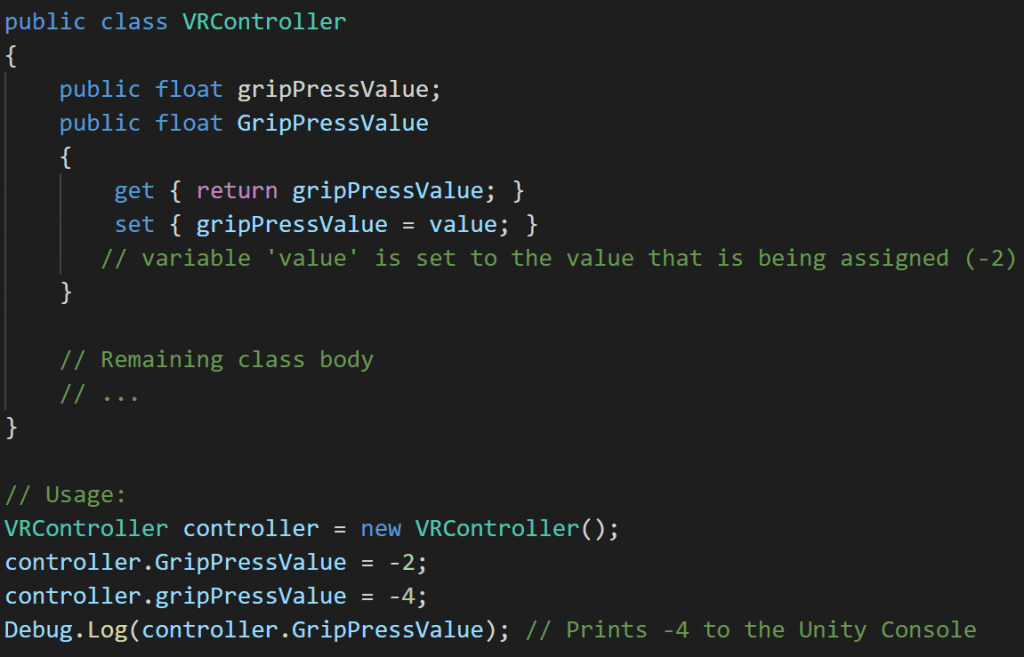
In this example, we can still set gripPressValue and GripPressValue outside the class, and even assign an invalid value (-2) to it.
It is common to name a property as a PascalCase version of its field’s name, hence gripPressValue becomes GripPressValue.
There is also a shorthand to declare properties:
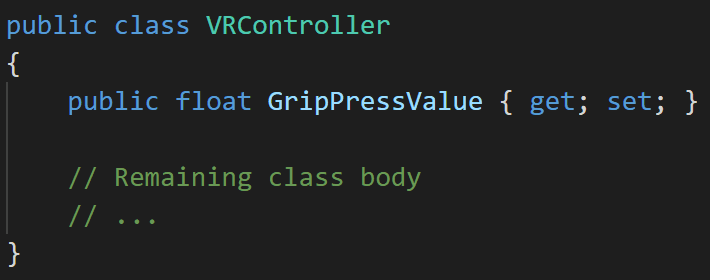
This way C# will automatically create a float variable in the background to pair with the property.
As stated above, the get and set are nothing more than functions that get called when the property is either accessed or assigned. That means we can do whatever we want that would fit any other method, like setting a different access modifier, or having more complex statements on its body.
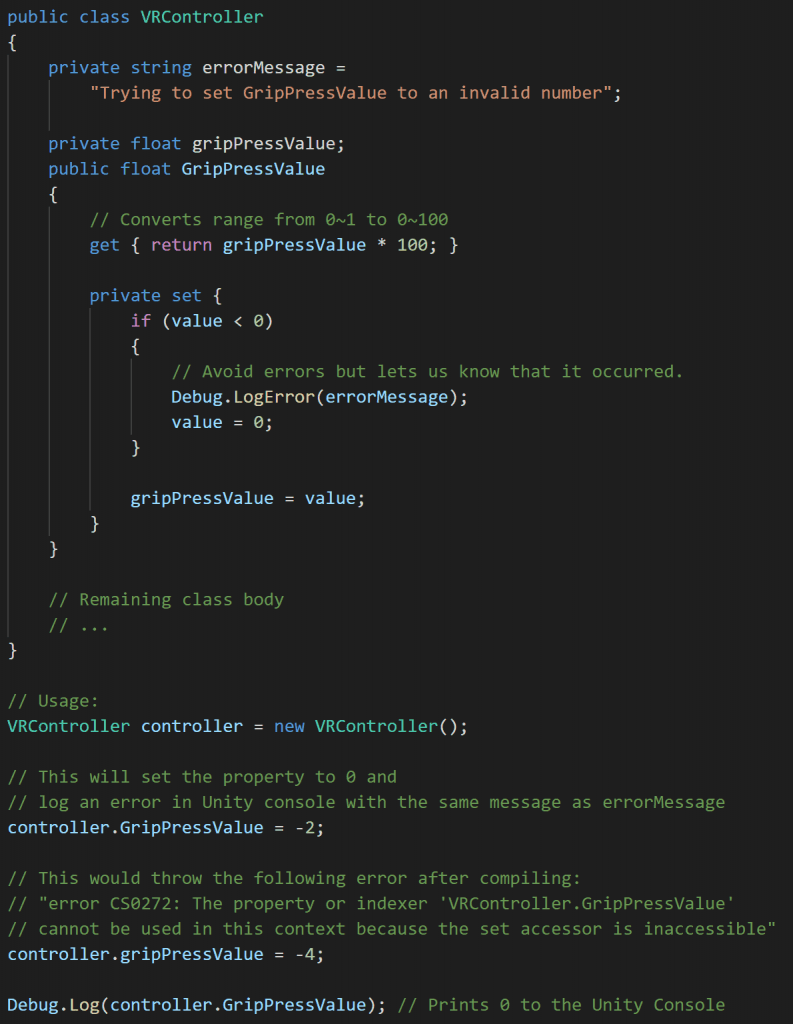
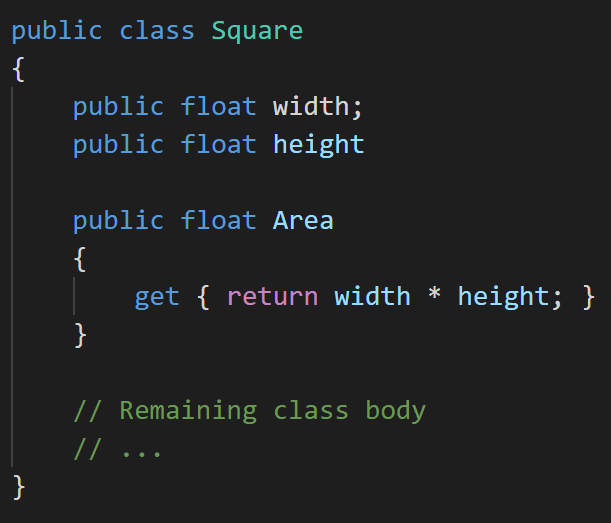
Finally, you can have properties that have only the "get," but not the "set." The main usage for this is readability and maintainability. Whenever you have things that keep repeating across your program, it’s a good idea to find a way to group all that into a single implementation. We already know we can do this with methods, and now we can also do it with properties.
It’s important to know that you can only do this if the logic you are trying to implement doesn’t depend on any external argument, as getters take no parameters.
Another good thing to think is, should this be a method or a property? In a more philosophical or architectural sense, is this an action the class does, or some part of it?
Constructors
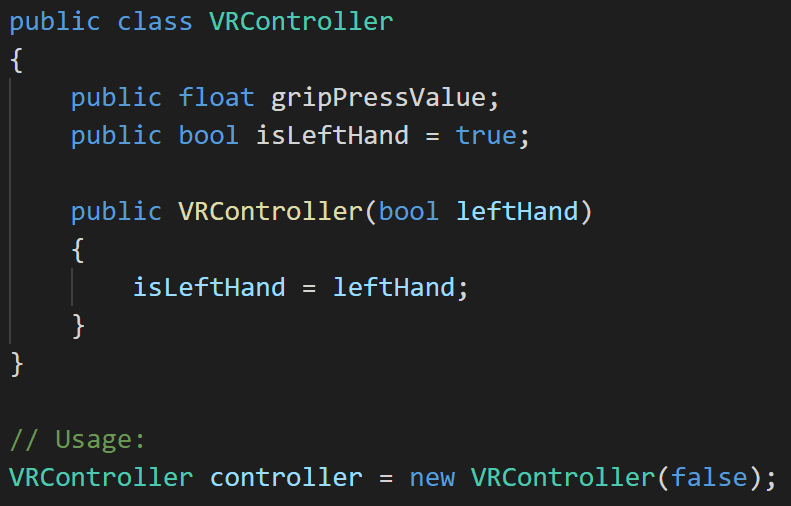
For now, every time we instantiate a class, we have to set each of its fields one by one, but as stated before, duplicated code is the recipe for disaster. This is where Constructors come in, they are basically a method that gets called when we instantiate a class.
We have been calling these from the start: "new VRController();".
Usage
Constructors are declared in the same way a method is, apart from not having a return type, and it must share the exact name of its class.
Again, just like methods, it can have overloads and as many parameters as you please.
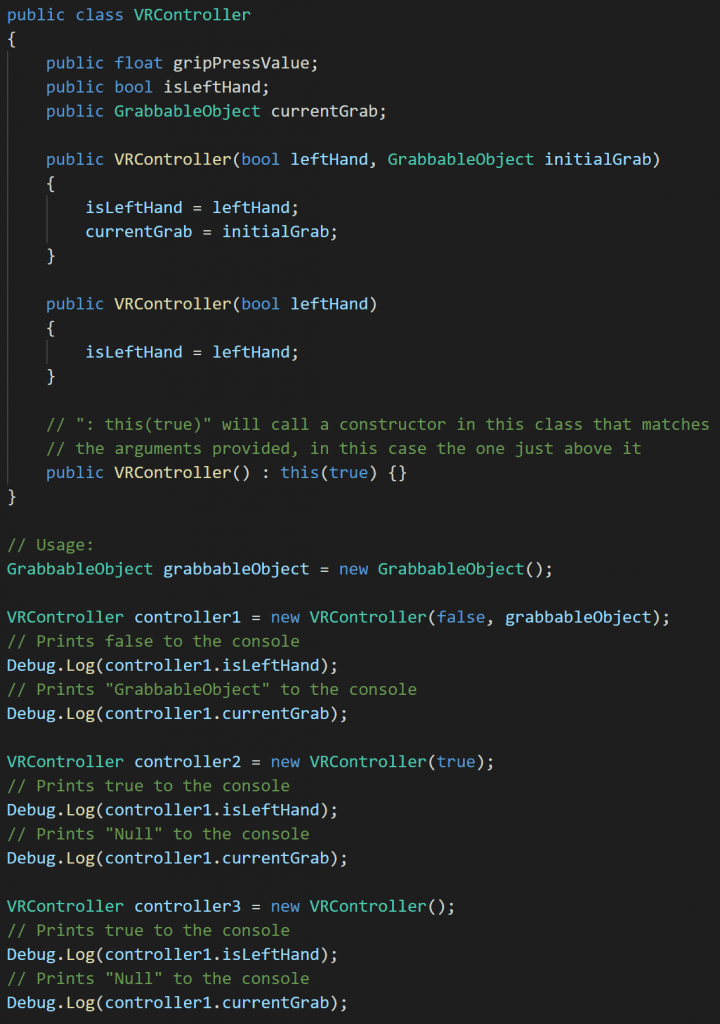
If you don’t specify a constructor C# will create a parameterless empty constructor automatically, and this is how our previous examples were working just fine 🙂
Introduction to Static
Classes are like recipes to how to instantiate objects, defining what it can do and its fields, methods, and properties. We can have as many objects as we please, but what if we wanted to have some information or actions that belong to the class itself, to the data type, not to a particular object?
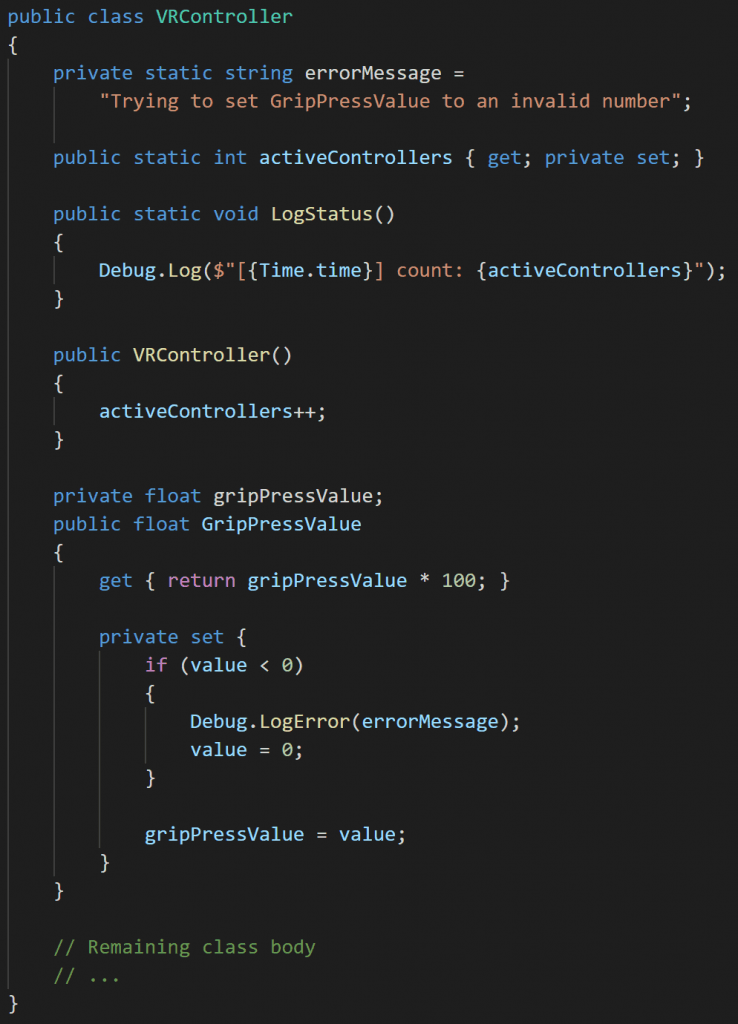
Statics are a way to tie fields, methods, and properties to the class itself, instead of its instances.
Usage
Just add the keyword "static" after the access modifier to make a field, method, or property static.
Private static members can only be accessed by instances of the class or other static members.
Static members can be accessed without the class being ever instantiated.
A class can be made static if there are only static members on it.
Be careful with statics, if you just start turning everything into static out of laziness or without much thought, you will quickly get unmaintainable code, completely coupled (hard to make changes to), and hard to understand. Statics can be really powerful, but they should be used sparingly; often solutions without it are better in the long run, but it is acceptable to use shortcuts for prototypes or similar situations.
Good Static Usage Examples:
The "errorMessage" in the example stores a value that is common to every instance of VRController and thus uses less memory.
The Singleton Pattern can be really powerful, but this is something that can get out of control easily; I recommend it only for prototyping.
Coming up next!
Next week we’ll take a look at Inheritance and Interfaces, and lay even more tools on top of classes, helping organize, reuse, and expand our code. That will be our last chapter before diving into creating a fully functional Unity project! 🎉
Happy coding 🙂🔙 Back to the Learn C# for Unity menu

